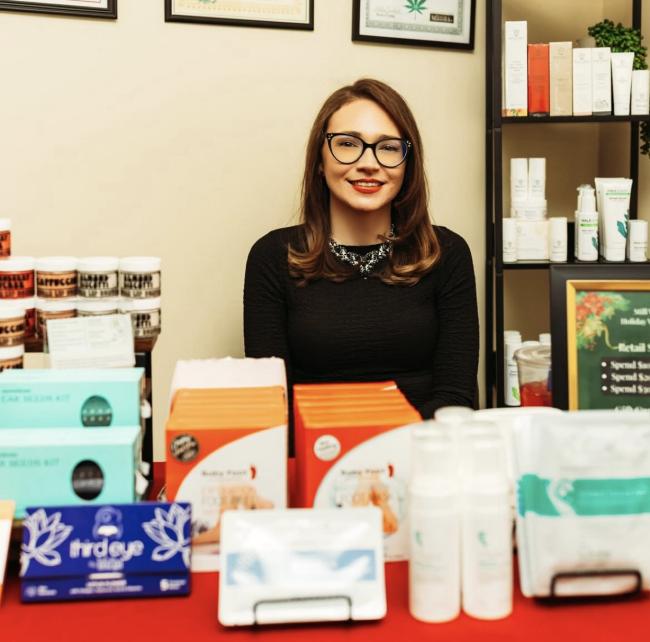

Treatment Provider
The Light Centre
The Light Centre offers professional therapy rooms and wellness spaces across central London, supporting therapists, hea…
Read More >>
74 results for Skin Peels (Chemical Peels)
Waxing removes unwanted hair from the root using warm or hot wax, giving smooth skin that typically lasts longer than shaving because the hair has to regrow fully before it reappears. It can be used on the legs, arms, underarms, face (such as the upper lip, chin and brows), back, chest and the bikini or intimate area, with a Brazilian or Hollywood removing most or all of the pubic hair. Practitioners usually work with either strip wax, where fabric or paper strips lift the wax and hair away, or hot (peelable) wax that sets and is removed without strips, which many find gentler for sensitive and intimate areas. Results build over time, and with regular appointments hair often grows back finer and more sparsely for some people, though this varies. Waxing is a well-established beauty treatment rather than a medical one, but it is not suitable for everyone or for every stage of skin health. Some skin conditions, medications and recent treatments make it unsafe, so a good therapist will check your suitability first. Choosing a trained, insured therapist working in clean, hygienic conditions makes a real difference to both your comfort and your safety, and to the quality of the finish you can expect.
Let the hair grow to roughly a quarter of an inch, or about the length of a grain of rice, so the wax can grip it properly; if it is too short it will not lift cleanly, and very long hair can be trimmed first. In most cases it helps to gently exfoliate and moisturise in the days beforehand, but stop moisturising on the day itself and arrive with clean, product-free skin, as oils and creams stop wax adhering. Avoid sunbeds, sunbathing and fake tan in the days before, and do not book waxing over sunburnt, broken or freshly treated skin. Tell your therapist in advance about any medication, skin conditions or recent treatments such as chemical peels, laser or microdermabrasion. Many people find it more comfortable to avoid caffeine and alcohol beforehand and, where relevant, to book outside the most sensitive days of their menstrual cycle. A warm shower beforehand can soften the follicles.
Your therapist will typically start with a short consultation about your health, medication and any previous reactions, then cleanse the area. Warm wax is applied in the direction of hair growth using a spatula, and either a strip is pressed on and removed, or hot wax is left to set slightly and then flicked off, both taken away against the direction of growth to lift the hair from the root. You will feel a quick pull with each section, which passes almost immediately; the therapist often applies gentle pressure straight afterwards to ease it. They should use a fresh spatula each time rather than double-dipping into the pot, and work in an unhurried, methodical way. Afterwards they may tweeze any stray hairs, remove residue and apply a soothing lotion. A full leg or intimate wax takes longer than a lip or brow. A good therapist will keep checking you are comfortable and will explain what they are doing throughout.
For the first 24 to 48 hours the follicles are open and the skin is more sensitive, so treat the area gently. Keep to lukewarm showers rather than hot baths, saunas or steam rooms, and avoid swimming pools for a day or so. Skip perfumed products, deodorant on freshly waxed underarms, make-up over the area, and sunbeds, sunbathing and fake tan while the skin settles. Avoid heavy exercise and tight, non-breathable clothing straight after an intimate wax, as heat, friction and sweat can cause irritation. Wear loose, clean cotton where possible. If the skin feels tender, a cool compress or a plain, fragrance-free soothing gel such as aloe vera can help. From two to three days afterwards, begin gently exfoliating a few times a week and keep the skin moisturised, which helps prevent ingrown hairs. Try not to touch or pick at the area with unwashed hands.
Hygiene is central to safe waxing. Your therapist should wash and sanitise their hands, work in a clean environment, use fresh couch roll and, crucially, never double-dip the spatula back into the wax pot after it has touched your skin, as this can spread bacteria. Choose someone who is trained in waxing and holds professional insurance, and who takes a proper health and medication history before starting rather than pressing ahead regardless. Wax should be tested for temperature so it is comfortably warm, not hot enough to burn. Waxing should only be done on healthy, intact skin, so it should be avoided over cuts, sunburn, active eczema, psoriasis or rosacea flare-ups, moles, warts, varicose veins and recently treated or peeling skin. If anything feels too hot or the environment looks unclean, it is reasonable to stop and ask questions. A patch test may be offered, especially before intimate or sensitive-area waxing.
Some medications and conditions make waxing unsafe because they thin, fragile or over-sensitise the skin, raising the risk of tearing, lifting, bruising or burns. Isotretinoin (Roaccutane) is a key one: skin usually should not be waxed while taking it and for a period after stopping, with around six months commonly advised, though you should check with your prescriber. Topical retinoids and acids such as tretinoin, retinol, adapalene and glycolic acid should be paused on the area beforehand, as should recent chemical peels, laser, IPL or microdermabrasion. Blood-thinning medication, some antibiotics, diabetes, circulatory problems, autoimmune conditions and pregnancy all warrant caution and, where appropriate, a word with your GP first. Waxing is not a treatment for any skin or medical condition and makes no health claims. Always tell your therapist about your full medical history and any medicines, prescribed or over the counter, so they can judge whether it is safe or whether to postpone.
A skin patch test is not routine for every wax, but a thorough consultation and health check before your first appointment matters just as much. Your therapist should ask about medication, skin conditions, allergies (including to ingredients such as rosin or colophony in some waxes), pregnancy, hormonal treatments and recent skin procedures, and inspect the area to confirm the skin is healthy and intact. A small patch test is sensibly offered if you have sensitive or reactive skin, a history of reactions, are pregnant or on hormonal medication, or are trying a new wax type. This protects you from an unexpected reaction and reflects good, insured practice: skipping these checks can leave a therapist at fault if something goes wrong. Sensitivities can also develop over time, so the history should be revisited at repeat visits, not assumed unchanged.
Be cautious if the therapist double-dips the same spatula back into the wax pot, reuses strips between clients, or works in a visibly unclean space without fresh couch roll or clean hands. It is a warning sign if no one asks about your medication, skin conditions or medical history, or if they wax over sunburn, cuts, active eczema or psoriasis, moles or recently peeled skin without hesitation. Wax that feels too hot, being rushed or pressured, dismissing your discomfort, or an unwillingness to answer questions about training, insurance or hygiene are all reasons to pause. Guarantees that waxing will permanently remove hair, or pushing on despite your telling them you take Roaccutane or blood thinners, should also give you real cause for concern.
Good practice looks like a clean, tidy room, freshly sanitised hands, disposable couch roll and a spatula that is used once and never dipped back into the pot. A reassuring therapist takes a proper health and medication history, checks your skin is suitable, tests the wax temperature and explains what they are doing as they go. They hold recognised waxing training and up-to-date professional insurance, are happy to answer questions, and will honestly postpone or decline if waxing is not safe for you that day. They talk you through realistic expectations, tailor the approach to your skin's sensitivity and the area being treated, and send you away with clear aftercare advice. Feeling comfortable to speak up and being checked on throughout are signs of a considerate, professional service.
Waxing involves a quick, sharp pulling sensation as each section of hair is lifted from the root, followed by a brief sting or warmth that usually fades within seconds, eased by the gentle pressure a therapist applies straight after. The warm wax itself feels comfortably hot but should never burn. Sensitive and intimate areas, coarser hair and a first-ever wax tend to feel more intense, while regular waxing often becomes more tolerable as the hair grows back finer. You may feel some tenderness, tingling or warmth for a short while afterwards, and small raised bumps around the follicles are common and normal. Skin can be more sensitive around your menstrual cycle. Tell your therapist at any point if something is too painful.
There is usually little to no real downtime. Most people notice some redness, warmth and small raised bumps around the follicles straight after, particularly on first-time or sensitive-area waxes, and this typically settles within a few hours to a day. More sensitive or intimate areas can stay slightly pink or tender for a little longer. You can generally return to normal activities right away, though it is sensible to avoid heat, heavy sweating and friction for the first day. If redness, swelling or discomfort is getting worse rather than better after a couple of days, or you see signs of infection, seek advice from your therapist or a pharmacist or GP.
Smooth results from waxing typically last around three to six weeks, depending on your natural hair growth cycle and the area treated. Because the hair is removed at the root, regrowth is softer and less stubbly than after shaving, and with regular waxing every four to six weeks many people find growth becomes gradually finer and more sparse, though this varies from person to person and is not guaranteed to be permanent. For the best results, let the hair reach a suitable length between appointments rather than shaving in between, which resets the cycle. Regular gentle exfoliation two to three times a week and daily moisturising between visits help keep skin smooth and reduce ingrown hairs. Booking on a consistent schedule keeps regrowth even and often makes each session more comfortable. Your therapist can tailor the frequency and areas to your hair type, skin sensitivity and how quickly you regrow.
Dip powder nails are a long-wear manicure system that sits somewhere between gel and acrylic. Rather than curing colour under a UV or LED lamp, the natural nail is coated with a bonding liquid, then dipped into (or sprinkled with) a finely milled coloured powder, with the process repeated to build strength and shade. An activator and a glossy sealer set everything firm. Because there is no lamp step, the finish dries quickly, and many people find it feels lighter and less rigid than acrylic while still lasting around three to four weeks. The powders are acrylic-based, so this is a durable, hard-wearing option rather than a gentle one. The look can be tailored to what you want, from natural, barely-there nudes to bold colour, French tips or a subtle strengthening overlay on your own nails. The main things worth understanding before you book are hygiene around shared powder pots, the potential for acrylate allergy, and the fact that removal relies on soaking in acetone. With a careful, well-trained technician and sensible upkeep, dip powder is generally a safe, low-fuss way to keep a polished manicure for weeks at a time.
You do not usually need to do much to prepare, but a few simple steps help the finish last and keep your nails healthy. Arrive with clean, product-free nails where possible, and avoid applying hand cream or cuticle oil on the day, as oils stop the bonding liquid gripping properly. If you have had a reaction to gel, acrylic or dip in the past, or you have noticed itching, lifting or soreness around previous manicures, mention it when you book so the technician can talk through options. Tell them about any skin conditions around the nail, recent nail damage, or medication such as anything that affects healing. It is worth asking in advance how they handle the powder, as reputable salons sprinkle or pour into a single-use pot rather than having everyone dip into one shared jar. If your natural nails are already thin or peeling, a short break or a strengthening overlay may suit you better than repeated full colour.
Your technician will start by gently shaping your nails and tidying the cuticle area, ideally pushing back rather than aggressively cutting. The nail surface is lightly buffed so the product can grip, then a bonding or base liquid is brushed on. Your nail is dipped into the coloured powder, or the powder is sprinkled over it, and the excess is brushed away. This base-and-powder step is usually repeated a couple of times to build colour and strength. An activator is applied to harden the layers, the nails are shaped and buffed smooth, and a glossy sealing topcoat finishes the look. The whole appointment typically takes around 45 minutes to an hour. It should be comfortable throughout; buffing may feel warm or slightly ticklish, but it should never be painful. A good technician keeps the buffing light to protect your natural nail and checks in on how the shape and shade are looking as they go, so you can adjust before it is sealed.
Dip powder is hard-wearing once sealed, but a little care keeps it looking good and protects the nail underneath. For the first hour or two, avoid knocks and prolonged hot water so everything fully hardens. After that, wear gloves for washing up, cleaning and gardening, as harsh chemicals and constant soaking loosen the edges and can encourage lifting. Massage cuticle oil in daily; it keeps the skin around the nail supple and helps prevent the product catching and peeling. Try not to use your nails as tools for scratching, prising or picking, which is the quickest way to snap a nail or pull off a layer. If a corner does lift, resist the urge to peel or pick it, as that tears away the top of your natural nail. Instead, book a repair or removal. Keep an eye out for any redness, itching, swelling or soreness around the nail, and if that appears, stop and seek advice rather than reapplying over it.
The two things that matter most with dip powder are hygiene and how the product is handled. The main risk comes from everyone dipping into one shared powder pot, because that can pass bacteria, fungi or viruses between clients. A responsible technician avoids this by sprinkling the powder onto your nail or pouring a portion into a single-use container, so nothing that has touched your finger goes back into the main jar. Tools should be sterilised or single-use, and the work area clean. Buffing and filing should be light and controlled, as over-thinning the natural nail is a common cause of long-term weakness. Removal should always be done by soaking in acetone, never by peeling, prising or forcing the product off, which strips layers from your own nail. If you have diabetes, poor circulation, a compromised immune system or any infection or broken skin around the nail, get advice first, as nail infections can be more serious in these situations.
Dip powder is a cosmetic treatment, not a medical one, but a few health factors are worth flagging. The powders and liquids are acrylate-based, and acrylate allergies are increasingly recognised, so if you have reacted to gel, acrylic, dip or even some adhesive plasters, be cautious and speak to your technician or GP first. Anyone with diabetes, poor circulation or a weakened immune system should take extra care, because a minor nick or an unnoticed infection around the nail can become more of a problem and heal more slowly. If you are pregnant, there is no strong evidence against a dip manicure, but a well-ventilated salon is sensible, as some products can give off fumes and fine dust. Ongoing nail changes such as persistent discolouration, thickening, separation from the nail bed, pain or swelling are not something a manicure should mask; see your GP or a dermatologist, as these can signal an infection or other condition that needs proper assessment rather than another coat of colour.
A formal patch test is not standard for dip powder in the way it is for hair or lash dye, but the risk of an acrylate allergy is real, so a sensible precaution is worth taking, especially if you have reacted to gel, acrylic or dip before. Some technicians will apply and seal a single test nail and ask you to wait several days to check for any itching, redness, swelling or lifting before committing to a full set. At the very least, a good salon will run through a consultation covering your history of nail-product reactions, skin conditions, and any infection or damage around the nail. This matters for your safety and for liability, because an allergic reaction that could have been anticipated is easier to defend against when the practitioner has recorded that they checked. Bear in mind that sensitivities can also build up gradually over repeated sets, so a clear history once does not guarantee you will never react.
Be wary if the technician has everyone dip their fingers straight into one shared powder pot, as this is the main hygiene concern and a well-run salon avoids it by sprinkling or decanting. Other warning signs include tools that are not visibly cleaned or sterilised between clients, a technician who files or buffs your natural nail hard enough to cause heat or soreness, or one who cuts cuticles aggressively and draws blood. Removing dip by peeling, prising or forcing it off rather than soaking in acetone is a clear red flag, as it strips your natural nail. Applying fresh product over an existing infection, lifting, or a nail that is red, swollen or sore is not acceptable. During the appointment, any real pain, burning or a strong reluctance to answer your questions about hygiene should make you pause.
Good practice is easy to spot once you know what to look for. A careful technician sprinkles the powder onto your nail or pours a portion into a single-use pot, so nothing goes back into the shared jar after touching your finger. Tools are sterilised or single-use, the work station is clean, and hands are washed before starting. They buff and file lightly to protect your natural nail rather than thinning it, and push cuticles back gently rather than cutting them hard. They ask about previous reactions to nail products and any health conditions before beginning, and they are happy to explain their hygiene routine. Removal is done by soaking in acetone, not peeling. A good salon also gives honest advice on upkeep, suggests occasional breaks for your nails, and tells you to come back for a repair rather than picking at any lifting yourself.
Dip powder should be a comfortable, relaxing treatment with no real discomfort. As your technician buffs the nail surface you may feel a light, ticklish vibration and a little warmth, but nothing sharp or painful. The bonding liquid and activator can feel cool and have a noticeable smell, and some people find the products and fine dust a little strong, so a well-ventilated space helps. The finished nails feel firm and solid rather than heavy, and many people say they feel lighter than acrylic. You should not experience burning, stinging, throbbing or soreness at any point; if you do, tell your technician straight away, as pain during buffing usually means the natural nail is being worked too hard.
There is no downtime with dip powder nails, and you can use your hands straight away, just gently for the first hour or so while the layers finish hardening. Most people go back to normal life immediately. Over the following weeks you may notice a small gap appearing at the base as your nails grow, which is normal and a cue to book a refill or removal rather than letting the edge lift. If your natural nails feel thin or a little tender after removal, that usually settles with cuticle oil and time. Giving your nails an occasional break between sets helps them recover.
Dip powder typically lasts around three to four weeks, which is one of its main attractions. As your nails grow you will see a small gap appear at the base, and that is the moment to book a refill or a full removal rather than letting the edge lift and catch. Daily cuticle oil and gloves for wet or messy jobs noticeably extend how long a set stays neat. When it is time to remove it, have it soaked off in acetone rather than peeling or picking, which pulls layers from your natural nail and leaves it thin and rough. Many technicians and dermatologists suggest giving your nails an occasional break between sets, and keeping them oiled and moisturised in between, so they stay strong over the long term. The look is easy to tailor each time, from natural nudes and French tips to bold colour, so you can change it up at every appointment while keeping upkeep straightforward.
A French manicure is a classic, understated nail finish: a natural or softly pink base with a crisp white tip along the free edge of the nail. It suits most occasions, grows out neatly and flatters a wide range of nail shapes and lengths, which is part of why it has stayed popular for decades. Your technician will begin with nail and cuticle preparation, then create the look using either regular (air-dry) polish or a longer-lasting gel or builder system such as BIAB, cured under a UV or LED lamp. The finish can be tailored to you: a delicate, barely-there tip for a subtle look, a bolder or coloured tip, or variations like a micro-French or reverse French. As a treatment it is low risk and comfortable, and the main things that protect your nails are good salon hygiene, well-maintained tools and sensible aftercare. If gel or builder products are used, a little more care is needed around application, removal and the small chance of product sensitivity, which we cover below.
Little preparation is needed for a French manicure, but a few simple steps help. Arrive with clean, product-free nails where possible, and avoid cutting or aggressively pushing back your own cuticles beforehand, as the intact skin around the nail is your natural barrier against infection. If you are having gel or builder gel, go easy on hand cream on the day, since oils can affect how well the product bonds. Let your technician know if you have ever reacted to nail products, if your natural nails are very thin, peeling or damaged, or if you have any skin conditions, cuts or infections around the nails, as these may need to settle first. Mention if you are pregnant or have sensitive skin so products can be adapted where sensible. Bring a photo if you have a particular style of tip in mind, and allow a little extra time if you need existing gel or acrylic removed first.
Your technician will usually start by tidying the nail shape, gently caring for the cuticles and lightly buffing the nail surface. With a regular polish French, a base coat goes on first, then the natural or pink base colour, the white tips, and a top coat, with drying time between layers. With a gel or builder version, each layer is cured under a UV or LED lamp for a few seconds at a time, and the white tip is drawn by hand or shaped with a guide. Creating a clean, even smile line along each tip is the skilled part, so this is not a treatment to rush. You may briefly feel a warm sensation in the nail as gel cures, which settles quickly. A typical appointment takes around 30 to 60 minutes depending on whether you choose regular or gel and how detailed the design is. Throughout, tools should be clean and your comfort checked.
For a regular polish French, allow plenty of drying time and avoid knocks, hot water and washing up for a couple of hours, as the finish stays soft at first. For a gel or builder French, the polish is set once cured so you can use your hands straight away. In both cases, applying cuticle oil daily is the single most helpful habit, keeping the skin and nail flexible and reducing lifting and chips. Wear gloves for cleaning, gardening and prolonged water contact, and try not to use your nails as tools. Resist picking or peeling gel, as this pulls away layers of the natural nail and leaves it thin and weak. If a tip chips or an edge lifts, book a repair rather than pulling at it. Book a professional soak-off or infill rather than forcing gel off at home, and give your nails an occasional break if they feel dry or fragile.
A French manicure is low risk, and good hygiene is what keeps it that way. Tools that touch the skin, such as cuticle nippers and metal pushers, should be properly cleaned and disinfected or sterilised between clients, and disposable items like nail files, buffers and orange sticks should ideally be single-use or kept for you alone. The workstation, towels and hand rests should be clean, and your technician should not work on nails that show signs of infection, such as redness, swelling, pus or green or crumbling nails, until these have been checked. If gel or builder products are used, uncured gel should not sit on your skin, as repeated skin contact with liquid gel is the main way product allergies develop. A tidy, well-lit salon with a technician who is trained, insured and happy to explain their hygiene routine is a reassuring sign. When in doubt about your nail or skin health, ask before booking.
A French manicure is cosmetic and suits most people, but a few situations call for care. If you have diabetes, poor circulation or a condition affecting healing, cuticle work carries a slightly higher infection risk, so ask for gentle, minimal cuticle handling and see your GP or podiatrist if you notice any sore or slow-healing skin. Avoid manicures on nails or surrounding skin that are infected, broken or inflamed, including fungal nail infections, and seek advice first. If you are prone to skin allergies or have reacted to gel, acrylic or adhesives before, mention this, as the acrylate chemicals in gel and builder products can cause an allergic contact dermatitis that tends to worsen with repeated exposure. Gel and builder finishes are cured under UV or LED lamps; exposure is brief and low, but if you take medication that increases light sensitivity or have significant sun-sensitivity concerns, you can apply sunscreen to your hands or use fingerless UV gloves and discuss it with your practitioner.
A skin patch test is not routine for a standard French manicure, and regular air-dry polish rarely causes problems. The more useful safeguard is an honest consultation: your technician should ask about past reactions to nail products, skin conditions, cuts or infections around the nails, and any relevant medical history before starting. This matters most with gel and builder gels, where the acrylate chemicals can trigger an allergic reaction that builds up over time rather than on first contact, so a single test is not fully conclusive. Flagging any previous itching, redness or lifting means your technician can switch to a lower-risk or HEMA-free system and take extra care to keep uncured product off your skin. From a UK liability point of view, recording this consultation protects both you and an insured technician if a reaction is ever queried.
Be cautious if the salon looks unclean, tools are reused between clients without any visible cleaning, or files and buffers are grubby rather than fresh or clearly yours. Cuticle work that draws blood, painful over-filing of the natural nail, or a technician who ignores redness, swelling or an obviously infected nail are warning signs. With gel, liquid product repeatedly flooding onto your skin, or a technician dismissing a history of reactions, raises the risk of allergy. Aggressive drilling to remove gel, or being told to rip or peel it off at home, will damage your nails. A reluctance to explain hygiene practices, no insurance, or pressure to book without any consultation are all reasons to think again before going ahead.
Reassuring signs include a clean, tidy workstation, tools that are visibly disinfected or sterilised between clients, and fresh or single-use files, buffers and orange sticks. A good technician asks about your nail health, any past reactions and relevant medical history before starting, and handles cuticles gently rather than cutting deeply. They keep uncured gel off your skin, shape the natural nail without over-filing, and use a professional soak-off or careful infill rather than forcing gel away. They are trained, insured and happy to explain what they are using and why, offer HEMA-free options if you are sensitive, and give clear aftercare advice. Being willing to say no to working on an infected or damaged nail is a mark of a responsible, well-run salon.
A French manicure should feel relaxing and comfortable throughout. You will notice the light pressure of filing, buffing and gentle cuticle care, and the cool touch of polish or gel going on. With gel or builder systems, you may feel a brief warm or slightly hot sensation in the nail as each layer cures under the lamp, sometimes called a heat spike; it lasts only a few seconds and easing your hand out of the lamp for a moment settles it. You should not feel real pain, stinging, burning or soreness. Any sharp pain during filing, or itching, redness or discomfort in the skin around the nails afterwards, is not typical and is worth raising with your technician or GP.
There is no downtime with a French manicure and you can return to your day immediately, which is one of its appeals. With regular polish the only real consideration is drying time, so it is worth avoiding fiddly tasks for the first hour or so to prevent smudging. Gel and builder finishes are fully set once cured under the lamp, so there is nothing to wait for. Your nails should feel comfortable throughout; there is no soreness, redness or peeling involved in a properly applied manicure. If your skin or nails feel sore, itchy or irritated afterwards, that is not normal for this treatment and is worth mentioning to your technician or GP.
A regular polish French typically looks its best for around five to seven days before chips appear, while a gel or builder French usually lasts two to three weeks, with the exact wear depending on your nail growth, lifestyle and how much your hands are in water. As your nails grow, a small gap appears at the base, so many people book an infill or fresh application every two to three weeks to keep the smile line looking neat. Daily cuticle oil, gloves for wet or dirty work and treating your nails kindly all extend the finish and protect the natural nail underneath. The look is easily tailored over time, from a soft, subtle tip to a bolder white, a coloured or glitter tip, or styles like a micro-French. Giving your natural nails an occasional break from gel, and always removing it professionally, helps keep them strong and healthy in the long run.
Threading is a precise, chemical-free method of removing unwanted hair, most often used to shape the eyebrows and to tidy the upper lip, chin, cheeks and sides of the face. A trained technician twists a length of fine cotton thread and rolls it across the skin, catching individual hairs and lifting them cleanly from the follicle in neat rows. Because it removes hair at the root, results typically last longer than shaving, and because no wax or heat touches the skin, many people find it gentler on sensitive or reactive areas. It is one of the lower-risk beauty treatments, but the eye and brow area is delicate, so skill, hygiene and honest advice about your skin still matter. Threading suits most skin types and can be tailored to your preference, from a subtle clean-up to a defined reshape. It does not treat any skin condition and is purely a hair-removal and grooming service. A good practitioner will talk through the shape you want, check that your skin is healthy and intact, and work with fresh thread to keep the treatment clean and comfortable.
In most cases little preparation is needed. If you are reshaping your brows, letting the hair grow for a couple of weeks beforehand gives the technician more to work with and a better result. Arrive with a clean, make-up-free face where possible, as this keeps the area hygienic and lets the practitioner see your natural hair pattern. It helps to bring a reference photo or to be ready to describe the shape and thickness you would like, so the outcome matches your expectations. Avoid strong exfoliants, retinoids, acids or sunbeds and heavy sun exposure for a day or two beforehand, as these can leave skin more sensitive or fragile. If you have recently had a facial, peel or laser in the same area, mention this. Tell your technician about any skin conditions, medicines or recent treatments at the start, so they can adjust their approach or advise waiting if your skin is not suitable that day.
You will usually sit or lie back while the technician holds the skin taut with one hand and works a twisted cotton thread across the area with the other. The thread rolls over the skin and lifts several hairs at a time directly from the root, following the shape you have agreed together. You may be asked to hold your own skin or eyelid gently in place to help keep the area steady and the lines clean. Brow shaping typically takes only a few minutes; larger areas such as the full face take a little longer. A skilled practitioner works methodically, checking the shape and symmetry as they go and pausing to show you progress if you wish. The sensation is a quick, repeated light scratching or plucking feeling rather than the pull of wax. Fresh thread should be used for you, and the technician should have clean hands and a tidy workspace throughout.
Threading has minimal aftercare, but the follicles are briefly open afterwards, so a little care helps prevent irritation. Some redness or small pink bumps are normal and typically settle within a few hours to a day. Avoid touching or rubbing the area with unwashed hands, and try to keep heavy make-up off freshly threaded skin for the rest of the day to lower the risk of blocked pores or infection. A cool compress or a simple soothing gel such as aloe vera can calm any warmth, though some people prefer to leave the skin bare. For around 24 hours it is sensible to avoid saunas, steam rooms, hot workouts, swimming pools, sunbeds and strong sun, as heat, sweat and UV can aggravate sensitive skin. Hold off on exfoliating acids and retinoids on the area for a day or so. If you notice unusual swelling, spreading redness or signs of infection, seek advice from a pharmacist or GP.
Threading is low-risk, but good hygiene is what keeps it safe, because the thread runs directly across the skin and briefly opens the follicles. Fresh, clean cotton thread should be used for each client and never reused between people, and the technician should have clean hands and a clean working area. Choose a practitioner who is trained and experienced, ideally insured, and who works in a clean, professional setting. A careful technician will check that your skin is healthy and intact before starting and will not thread over broken skin, active acne, cold sores, sunburn, eczema or any inflamed or infected area, as this can spread bacteria or worsen the skin. The eye and brow area is delicate, so precision and steady skin tension matter to avoid nicks or catching the skin. If anything about the cleanliness or the practitioner's confidence feels off, it is reasonable to pause and ask questions before going ahead.
Threading is a cosmetic hair-removal service and is not a substitute for medical care, but a few health factors are worth flagging to your technician. If you take the acne medicine isotretinoin (Roaccutane) or have recently finished it, your skin can be thin and fragile and may lift or tear easily, so many practitioners will decline threading or advise waiting; guidance in this area is debated, so check with your prescriber or a GP first. Let your technician know if you use retinoids or acid exfoliants, take blood thinners or steroids, or have a skin condition such as eczema, psoriasis, rosacea or very reactive skin, as any of these can make skin more sensitive or prone to marking. Recent facials, peels, laser or microneedling in the same area also mean the skin may need time to recover. If you are unsure whether threading is suitable for your skin or medication, speak to a GP or your prescribing clinician before booking.
A skin patch test is not standard for threading, because it uses only cotton thread with no dyes, chemicals or products that commonly trigger allergy. What matters instead is a proper check before the technician starts. Expect a brief consultation covering your skin health, any medicines such as isotretinoin or blood thinners, recent treatments in the area, and the shape you want. The practitioner should look at the skin to confirm it is intact and free of active acne, cold sores, sunburn, eczema or infection before threading over it. These checks reduce the risk of irritation, marking or spreading bacteria, and they protect you and the practitioner if anything were later disputed. Being open about your history at this stage is the best safeguard; if in doubt about a medicine or skin condition, a GP or prescriber can advise whether to proceed.
Be cautious if the thread looks reused between clients, if the technician does not appear to take a fresh length for you, or if their hands and workspace are visibly unclean. It is a warning sign if no one asks about your skin, medicines or recent treatments, or if a practitioner is willing to thread over active acne, cold sores, sunburn, broken or infected skin. Rushed, heavy-handed work that repeatedly catches or nicks the delicate skin around the eyes is a concern, as is a practitioner who dismisses your questions about hygiene or shape, or who cannot explain their training or insurance. Pushy upselling, no consultation and a dirty or chaotic setting are all good reasons to pause and reconsider.
Good practice starts with a clean, tidy setting and a technician with clean hands who takes a fresh length of cotton thread for you. Look for someone trained and experienced who is happy to explain their approach and show they are insured. A good practitioner asks about your skin, medicines and recent treatments, checks the skin is healthy before starting, and talks through the shape you want rather than assuming. They work with steady, controlled tension, check symmetry as they go and pause to let you see progress. Clear, honest aftercare advice and a willingness to say no or reschedule if your skin is not suitable that day are strong signs you are in careful, professional hands.
Most people describe threading as a quick series of light scratching or plucking sensations as each row of hair lifts from the root, rather than the stronger tug of waxing. There can be a brief sting on more sensitive spots such as the upper lip or close to the inner brow, and your eyes may water a little around the brows, which is a normal reflex rather than a sign of harm. First-timers often feel it more, and skin can be more tender around the time of your period. Any discomfort is usually short-lived and eases as soon as the area is finished, often leaving a mild warm or tingly feeling for a short while.
Threading needs little to no downtime and most people return to their day straightaway. It is normal to see some redness, mild tenderness or a few tiny raised bumps immediately afterwards, particularly if it is your first time or the area is sensitive, and this typically fades within a few hours and often within a day. Because the treatment is quick and non-invasive, there is usually no lasting mark. If your skin runs reactive, you may prefer to schedule threading a day or two before an event rather than immediately before, so any short-lived redness has time to settle.
Because threading removes hair from the root, results typically last longer than shaving, commonly around two to four weeks, though this varies with your natural hair growth and cycle. As the hair grows back it tends to feel finer and softer than stubble, and regular threading can make regrowth look more even over time. Most people settle into a rhythm of every three to four weeks for brows to keep a defined shape, or as needed for facial areas. Between visits, avoid over-plucking at home, which can disrupt the shape your technician has created. The intensity of the result is easily tailored, from a light tidy that keeps your natural brow to a more defined reshape, so it is worth discussing your preference each time, especially if your ideal shape changes. Gentle daily brushing and a light moisturiser help keep the brows and surrounding skin in good condition between appointments.
A carbon laser facial, often called a Hollywood Peel, is a non-invasive skin treatment that combines a layer of medical-grade liquid carbon with a Q-switched Nd:YAG laser. A thin coat of carbon is applied and left to dry so it settles into the pores and binds to oil, dead skin cells and everyday debris. The laser is then passed over the skin, and its energy is absorbed by the carbon particles. This gently lifts away the carbon along with the material it has attracted, while the light energy warms the deeper skin to encourage a fresher, smoother, more even appearance. It is popular for oily or congested skin, enlarged-looking pores, dullness and uneven texture, and is sometimes used as part of a plan for mild acne. Because it is an energy-based laser device treatment, results and comfort depend heavily on the practitioner choosing the right settings for your skin. A single session can leave skin looking brighter, but a course is usually suggested for a more noticeable, longer-lasting change. It is a surface-level treatment rather than a deep resurfacing procedure, so honest expectations matter: in most cases it refreshes and evens the skin rather than removing deep scarring or significant pigmentation on its own.
Start with a face-to-face consultation so a trained practitioner can assess your skin type, review your medical history and confirm the treatment suits you. Avoid sun exposure, sunbeds and fake tan for at least four weeks beforehand, as tanned or sun-exposed skin raises the risk of burns and uneven pigment. Typically you should pause strong actives such as retinoids, and avoid recent chemical peels, waxing or other resurfacing on the area, for around a week or more before your session. Tell your practitioner about any medication, including blood thinners, and about photosensitising supplements such as St John's wort, which are often stopped in advance. If you are prone to cold sores, mention this, as the treatment can trigger a flare and preventative advice may help. Arrive with clean skin, free of make-up and heavy skincare where possible, and remove contact lenses if asked. Following the clinic's specific pre-care instructions closely helps reduce the chance of side effects and gives you the best, most predictable result.
The session usually takes around 30 to 45 minutes and is comfortable for most people. Your practitioner cleanses the skin, then brushes on a layer of liquid carbon and leaves it to dry for several minutes so it can settle into the pores. Everyone in the room wears protective eyewear, and you will be given goggles or eye shields, as laser light can harm the eyes. The laser is then passed over the face in two stages: a lower-energy pass that helps the carbon bind and lift debris, and a stronger pass that shatters and removes the carbon while warming the skin. You will hear a rapid clicking or snapping sound and may notice a faint smell. Most people describe a light tingling, warmth or a gentle pinprick sensation rather than pain, and settings can be adjusted to keep you comfortable. Afterwards the skin is wiped clean and a soothing product and SPF are applied. There is no need for numbing cream, and a well-judged treatment should not break the skin or draw blood.
Aftercare is straightforward but important for protecting the result. Keep the skin clean and gentle: cleanse with lukewarm water and a mild cleanser, and moisturise regularly to support the skin barrier while any mild dryness or flaking settles. Daily broad-spectrum SPF 30 or higher is essential, as freshly treated skin is more sensitive to the sun and unprotected exposure can cause pigment changes. For roughly the first week, avoid retinoids, exfoliating acids, scrubs and other abrasive or active products, and hold off on further facials or resurfacing until your skin has fully recovered. It is sensible to avoid heavy make-up for the first day or so, and to skip saunas, steam rooms, hot yoga and vigorous exercise for a day or two, as heat and sweat can aggravate the skin. Do not pick at any flaking. If you develop unexpected blistering, prolonged redness, unusual pain or signs of infection, contact your practitioner promptly and seek medical advice where needed.
As a laser-based treatment, safety rests firmly on the competence of the person operating the device. Choose a trained, insured practitioner working in a reputable clinic, who uses a properly maintained, appropriate laser and selects settings suited to your individual skin. Correct energy levels matter enormously: settings that are too aggressive, or a treatment given on tanned or unsuitable skin, can cause burns, blistering and lasting pigment changes, particularly in richer or darker skin tones where the risk of both darkening and lightening is higher. Eye protection is non-negotiable for you and everyone in the treatment room, as laser light can permanently damage the eyes. A thorough consultation, patch or test area where advised, and an honest discussion of your skin type and history all reduce risk. In England, a licensing scheme for non-surgical cosmetic procedures is still being developed and is not yet fully in force, so standards can vary between clinics; check what training, insurance and hygiene standards your provider follows and do not be afraid to ask.
This treatment is not suitable for everyone, so a full medical history at consultation is important. It is generally avoided during pregnancy and breastfeeding, on skin with active infections, and where there is a cold sore or herpes flare in the area. Conditions such as active eczema, psoriasis, rosacea, vitiligo or a tendency to keloid scarring may make it unsuitable or need medical input first. Photosensitising medicines, recent oral acne medication such as isotretinoin (Roaccutane), blood-thinning drugs, and light-sensitising supplements are all relevant and should be disclosed. People with epilepsy, uncontrolled diabetes, autoimmune conditions, or who have had recent sunburn or a fresh tan should also raise this beforehand. Very sensitive or reactive skin may find the treatment more irritating than a gentle facial. This is a cosmetic treatment and not a substitute for medical care: if you have a skin concern such as changing moles, persistent acne or a suspicious lesion, see your GP or a dermatologist rather than relying on a facial. If in doubt about any condition or medication, check with your GP before booking.
A traditional allergy patch test is not the central safeguard here, because reactions are usually about heat, energy and pigment rather than allergy. Instead, the key protections are a proper face-to-face consultation, a documented skin-type assessment (for example using the Fitzpatrick scale) and a review of your medical history and medications. Many reputable clinics also carry out a small laser test patch on an inconspicuous area, especially for medium to darker skin tones, to check how your skin responds before treating the whole face. These checks help the practitioner set safe energy levels and screen for contraindications, reducing the risk of burns or pigment changes. From a UK liability point of view they also matter: skipping consultation, suitability checks or a sensible test patch can leave an insured practitioner found at fault if something goes wrong, so their presence is a sign of good, responsible practice.
Be cautious if a provider skips the consultation, does not ask about your medical history, medications or previous sun exposure, or cannot tell you what type of laser they use. Not being offered eye protection, or seeing the practitioner work without it, is a serious warning sign. Treating recently tanned, sunburnt or clearly unsuitable skin, or pushing you into a session on the same day without proper assessment, suggests corners are being cut. Vague answers about training, insurance or hygiene, reused single-use items, or pressure to buy large packages before you have had one treatment are all reasons to pause. Promises that it will completely clear deep scarring, remove all pigmentation or work miracles in one session are unrealistic and a red flag for overselling.
Good practice starts with an unhurried, face-to-face consultation that covers your skin type, goals, medical history and any medications, with realistic expectations set honestly. A trustworthy practitioner is trained and certified in laser use, appropriately insured, and works in a clean, professional clinic with a well-maintained device. They assess your Fitzpatrick skin type, offer a test patch where sensible, and explain the settings they will use and why. Eye protection is provided as standard for everyone in the room. You should receive clear written pre-care and aftercare advice, including sun protection, and feel free to ask questions without pressure to book a course on the spot. Being told honestly if the treatment is not right for you, or if another option would suit you better, is a strong sign of a responsible provider.
Most people find a carbon laser facial comfortable and describe it as more of an odd novelty than a painful experience. As the laser passes over the skin you may feel light tingling, a gentle warmth, or a series of tiny pinprick or flicking sensations, a little like a mild elastic band tap in places. You will hear a rapid clicking or snapping sound from the device and might notice a faint burnt or smoky smell as the carbon is targeted, which is normal. Bonier areas such as the forehead, jaw and around the nose can feel slightly sharper. The skin often feels warm and looks flushed straight afterwards. If anything feels too intense, tell your practitioner, as the settings can usually be adjusted to keep you comfortable.
One of the main draws of this treatment is how little downtime it involves, which is why it is sometimes called a lunchtime peel. In most cases the main after-effect is mild redness or a warm, flushed feeling that settles within a few hours, and many people return to normal activities the same day. Some experience slight tightness, dryness or light flaking over the following days as the skin refreshes. Because responses vary with skin type and the settings used, a small number of people notice redness that lingers a little longer. Diligent sun protection and gentle skincare help recovery stay smooth and short.
Many people notice brighter, smoother, cleaner-looking skin and a more refined appearance to the pores soon after a session, though the immediate glow can be partly down to gentle exfoliation and settles over the following days. For congestion, oiliness, dullness and uneven texture, a course of sessions spaced a few weeks apart usually gives a more noticeable and lasting improvement than a single treatment. Results are not permanent, as your skin continues its natural cycle, so periodic maintenance sessions every few weeks or months are common to keep the effect. The outcome can be tailored to you by adjusting the number and frequency of sessions and combining them with a suitable skincare routine. Protecting your results relies heavily on daily sun protection and a gentle, consistent regime; without SPF, sun exposure can quickly undo the benefits. Set expectations honestly: it is a refreshing, evening treatment rather than a fix for deep scarring, significant pigmentation or advanced ageing, which may need other approaches discussed with a professional.
LED (light-emitting diode) therapy uses low-level, non-thermal light in specific wavelengths, usually delivered by a mask or panel held close to the skin, to prompt gentle changes in the cells. It is a non-invasive, needle-free treatment often chosen for congestion and blemish-prone skin, dullness, redness or as a comfortable finishing step after facials and other procedures. Different colours reach different depths and are used for different aims: red and near-infrared are typically used to support a plumper, calmer look, while blue is often used for blemish-prone skin. LED does not remove layers of skin, so it suits most skin types and tones. It works best as a gradual, cumulative treatment, meaning a short course over several weeks tends to give clearer results than a single session, with occasional top-ups to maintain them. Evidence is still developing and outcomes vary from person to person, so it is best viewed as a supportive skin-health treatment rather than a quick fix or a replacement for medical dermatology. Results can be tailored by adjusting the wavelength, session length and course frequency to your skin and your goal, ideally after a proper consultation with a trained skin therapist.
Come to your appointment with clean, product-free skin where possible, as make-up, heavy moisturiser, mineral sunblock and pigmented products can block or scatter the light. Your therapist will usually cleanse the area first. It is sensible to pause strong actives such as retinoids, benzoyl peroxide and glycolic or salicylic acids for a few days beforehand, because these can leave the skin more reactive. Tell your practitioner about any medicines or supplements that increase light sensitivity, including certain antibiotics like tetracyclines, and about any recent skin treatments, peels or laser work. Avoid fake tan and recent sunburn on the area. If you have a history of light-triggered conditions, epilepsy or seizures set off by light, eye problems or recent eye surgery, raise this before booking so suitability can be checked. Arriving well hydrated and giving an honest skin and health history helps your therapist choose the right wavelength and settings, and reduces the small chance of an unexpected reaction.
A session is calm and painless. After cleansing, you will lie back and eye protection, such as goggles or pads, will be placed over your eyes, since the light is bright and staring into it should be avoided. A mask or panel is then positioned close to the skin, or rested gently on it, and switched on for a set time, commonly around ten to twenty minutes. The device may feel slightly warm but should not be hot or uncomfortable. You will see coloured light through your closed lids and may notice a gentle glow around the room. There is no needling, cutting or peeling involved, so nothing should sting or break the skin. Many people find it relaxing and some drift off. Your therapist may combine it with other steps, such as a serum, mask or facial, or use it on its own. Sessions are often repeated as a short course spread over several weeks, because the benefit tends to build up gradually rather than appearing all at once.
LED is gentle, so aftercare is simple. Your skin may look a little flushed straight afterwards, which usually settles within an hour or so. You can normally moisturise and apply make-up the same day. Because light treatments can leave skin marginally more reactive, apply a broad-spectrum SPF and limit strong sun exposure for a day or two, and keep up daily SPF as good routine skincare in any case. Keep the skin well hydrated and, for the rest of the day, favour soothing products over strong actives such as retinoids and acids, reintroducing them once any redness has fully settled. Drinking plenty of water supports general recovery. If you have had LED as a finishing step after a more active treatment, follow the aftercare for that main treatment as the priority. Most people carry on with their day as normal. If you notice lasting redness, stinging, itching or any rash that does not settle quickly, stop and contact your practitioner for advice.
Although LED is low-risk and non-invasive, safe treatment still depends on a competent, trained practitioner using a well-maintained, properly certified device at the correct wavelength, distance and timing for your skin. Eye protection is important, because the light is bright and prolonged direct exposure can strain or potentially harm the eyes, so goggles or pads should always be offered and you should never stare into the light. A good practitioner screens for contraindications first, including light-sensitive conditions, photosensitising medication, epilepsy or seizures triggered by light, active skin infections or unexplained lesions, and recent eye surgery. Devices should be cleaned between clients. Professional in-clinic units are generally stronger than home masks, so settings and session length should be matched to you rather than pushed to extremes. If your skin stings, burns or stays red well beyond the session, treatment should stop. LED should never be sold as a cure for medical skin disease; persistent or worsening skin concerns need a GP or dermatologist.
LED is best treated as a supportive skin treatment, not medical care, and it should not be used to diagnose, treat or replace management of a medical condition. Some people should take particular care or seek medical advice first. This includes anyone with light-triggered conditions such as porphyria, lupus, polymorphic light eruption or photosensitive eczema, and anyone with epilepsy or seizures that can be set off by light. Certain medicines and supplements increase sensitivity to light, including some antibiotics such as tetracyclines and doxycycline, some acne medicines and St John's Wort, so check with a pharmacist or GP if you are unsure. People with eye conditions, or who have had recent eye surgery, should get medical clearance because of the bright light. Pregnancy is often treated as a precaution by clinics even though LED is non-thermal, so many will ask you to wait or seek your midwife's view. If you have any suspicious or changing moles or lesions, see a GP or dermatologist before cosmetic light treatment.
A skin patch test is not the usual requirement for LED, because it involves no dyes, chemicals or needles that commonly trigger allergy. What matters far more is a proper pre-treatment consultation that screens for contraindications, so your practitioner should ask about light-sensitive conditions, photosensitising medication, epilepsy or light-triggered seizures, eye problems or recent eye surgery, pregnancy, active infection and any suspicious skin lesions before starting. For sensitive or reactive skin, a shorter first session or a small trial area is a sensible way to check how you respond before a fuller course. This screening protects you and, from a UK liability point of view, protects the practitioner too: skipping the health check and settings review can leave an insured therapist found at fault if a reaction or eye problem occurs. Honest answers about your health and medicines are the single most useful safeguard.
Be cautious if no one asks about your health, medicines, eye history or light-sensitive conditions before treatment, or if eye protection is not offered and you are told to keep your eyes open under the light. Warning signs include a practitioner claiming LED will cure a medical skin disease, dramatic overnight results or replace prescribed treatment; these are overstatements. Dirty equipment, a mask that is not wiped between clients, or a device that feels hot rather than gently warm are concerns, as is being pushed into very long sessions or an expensive multi-session package with no consultation. During treatment, stinging, burning, headache or eye discomfort should mean stopping. Afterwards, redness that lasts well beyond an hour, blistering, a new rash or swelling is not normal for LED and should prompt you to seek advice.
Good practice starts with a proper consultation and a health and skincare history taken before any light is switched on, with time to discuss what LED can and cannot realistically do. A trustworthy practitioner is trained in the device they use, holds appropriate insurance, and works from clean premises with equipment wiped between clients. They will offer eye protection as a matter of course, position the device at the correct distance and time the session sensibly rather than pushing extremes. They should be honest that results build over a course and vary between people, tailor the wavelength and plan to your skin and goal, and be comfortable saying LED is not right for you or referring you to a GP or dermatologist where a concern is medical. Clear pricing, written aftercare and no pressure to buy large packages are all reassuring signs.
LED is one of the more comfortable skin treatments. Most people feel little more than a gentle, spa-like warmth and see coloured light through their closed eyes. There is no needling, cutting, pulling or peeling, so it should not sting or feel sharp. The device may feel mildly warm but never hot, and many find the experience calming and even a little sleepy. Some people notice a faint after-glow or slight flushing on the skin once the mask is removed, which soon fades. If at any point you feel burning, real heat, a headache or any eye discomfort, tell your practitioner and the session should stop. Anything painful is not a normal part of LED.
There is typically no downtime with LED therapy, which is one of its main attractions. Most people return to work, exercise and normal activities straight away, and make-up can usually go on the same day. Any mild flushing or warmth generally fades within an hour. Because the treatment does not break the skin or remove layers, there is no peeling, scabbing or bruising to recover from. The trade-off is that results build gradually, so a course of sessions over several weeks is usually needed before changes become noticeable. If your skin feels tight or slightly sensitive afterwards, a simple moisturiser and SPF is normally all that is required.
LED works gradually, so results tend to build over a course rather than appearing after one session. Many clinics suggest a run of sessions, often once or twice a week over several weeks, followed by occasional top-ups to maintain the benefit. Because the effect is cumulative and not permanent, skin can drift back towards its previous state once treatment stops, so ongoing maintenance sessions or a home device are usually needed to keep results. Outcomes vary from person to person and the evidence is still developing, so it is fair to expect gradual, supportive improvement rather than a dramatic or lasting transformation. You will get more from LED by pairing it with a consistent skincare routine, daily SPF and realistic expectations. Your practitioner can tailor the wavelength, session length and frequency over time to match how your skin responds and what you are trying to achieve.